
this Reverse 1999 team comps companion covers the endgame mode rather than the tier list. Below: why the three teams cannot share a roster, who deserves Insight III, where resonance stops paying, how Psychubes and main stats should be ordered, and the pull math behind 180 Clear Drops per pull and a 12,600-Drop soft pity.
 Applicable version: 4.0.0 "The Doorkeeper" (updated 2026-09-24; source: official site version field, 2026-09-24)
Reverse: 1999 4.0 at a glance
The official site lists version 4.0.0 with an update date of 24 September 2026 . "The Doorkeeper" is a 4.0 story patch, so new characters and main-story content arrived together.
What changed in 4.0
The story patch brings new stage mechanics and a new character pool, and Somnambulism enemy lineups shift with it . Old full-star lineups do not transfer directly: change the enemy attributes and the counter-relationships change with them.
The order to do things
Finish the main story before touching Somnambulism. Story clears are the main source of one-off pull currency, and pulling before clearing wastes drops .

Reverse: 1999 Somnambulism: why three teams
Somnambulism requires multiple teams, and a character cannot appear in more than one. That is the first constraint on team building: how many functional characters you own decides how deep you go.
Damage, debuff, survival
The three teams are three functions, not three damage squads: one bursts, one grinds with status effects, one stalls with sustain . Once the jobs are separated, roster pressure drops sharply.
Depth scales team count
Higher layers demand more teams and raise enemy HP and resistance together . Building one perfect team and pushing through does not work; plan three early. A practical checkpoint: if your third team cannot survive two rotations on the layer you are attempting, stop pushing and spend a week on Insight and resonance instead. Attempting the same layer repeatedly burns resources that produce no reward.
Reverse: 1999 Insight III: one core per team
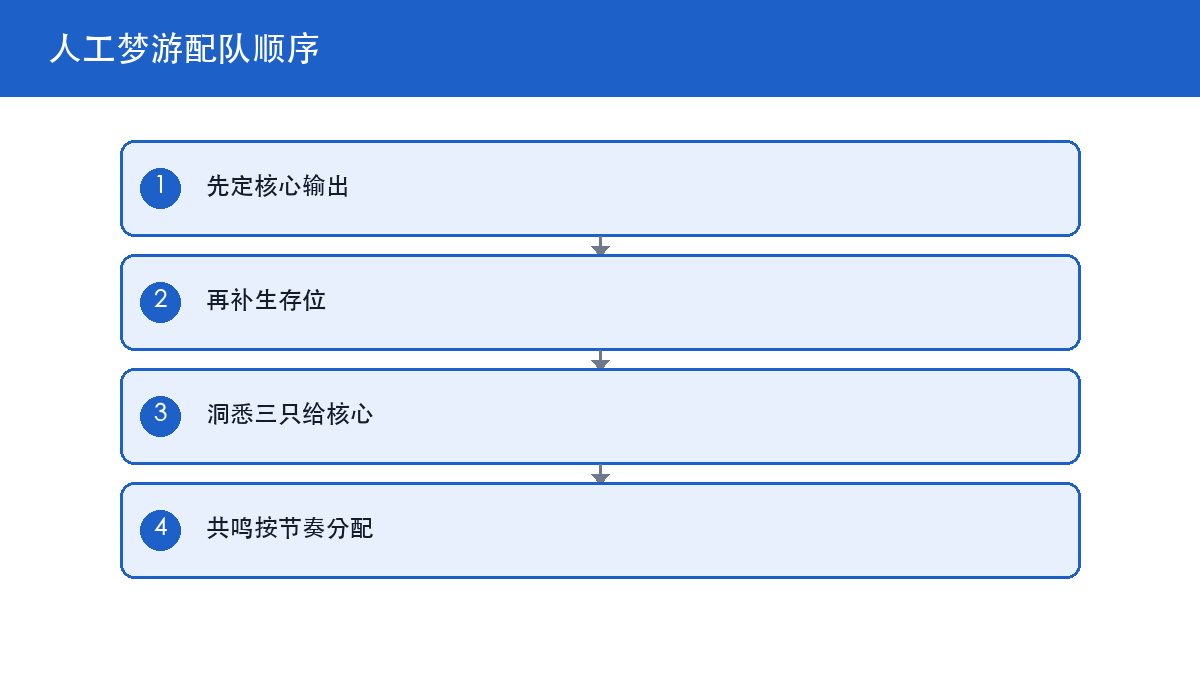
Insight III is the 4.0 progression gate, with heavy material costs and a long cycle. Give it to one core per team and leave supports at Insight II.
Order: damage, debuff, support
Damage dealers gain multipliers from Insight III, debuffers gain status accuracy, and supports mostly gain utility numbers . Split the investment in that order instead of averaging it out.
Where the materials come from
Insight materials drop from resource stages and event shops, split by attribute . Check the attribute before farming; wrong-attribute materials sit unused.
Reverse: 1999 resonance and Psychubes
Resonance supplies base stats and Psychubes supply set effects The priority is resonance to 10 first, Psychube sets second.
Resonance 10 is the value knee
Returns are linear up to 10 and drop noticeably after it . Push all three cores to 10 before over-investing in a single character.
Psychubes: main stat before set
The Psychube main stat decides the damage multiplier; set effects are a bonus. A 4-piece set with the wrong main stat loses to scattered pieces with the right one. Check the main stat on every piece before you level it: upgrading a wrong-main-stat Psychube is the single most common way players waste a week of materials.
Common misread: higher resonance is not automatically better. The materials for resonance 15 would take two supports from Insight II to Insight III, which is a bigger, more visible gain .
Reverse: 1999 team table: jobs and positioning
Positioning decides who eats hits first: front-row characters take damage first . Put sustain in front and damage in back as the baseline.
| Team | Job | Core slot | Positioning |
|---|---|---|---|
| Team 1 | Burst damage | High-multiplier single target | Damage back, support front |
| Team 2 | Debuff grind | Status applier | Debuff back, sustain front |
| Team 3 | Stall | Healer or shielder | Sustain front, damage back |
Team 1: shorten the fight
Team 1 exists to end fights in the fewest rounds. Keep the carry's skill cycle unbroken and the support's buffs covering every round .
Teams 2 and 3: grind and stall
Team 2 leans on status damage over time against high-HP single targets; team 3 heals and shields until the enemy kills itself . Team 3 does not need high investment, but it does need one reliable healer.
Reverse: 1999 planning: spending Clear Drops
A pull costs 180 Clear Drops, a 70-pull soft pity equals 12,600, and the 140-pull worst case is 25,200 .
Count the pity before pulling
Below 12,600 drops, pulling is a coin flip. Clear story and event one-offs first, then decide.
When to stop
If all three teams already full-star the mode, a new character is not decisive and the drops are better saved for the next patch .Character and stage records for this patch are collected on GameHub.
Reverse: 1999 FAQ
How many teams does Somnambulism need?
A: Multiple, with no character reuse; build three by job .
Who gets Insight III first?
A: Each team's core damage dealer, then the debuffer; supports stay at Insight II.
Where should resonance stop?
A: Push everything to 10 first, since returns drop sharply after that.
How many drops is a soft pity?
A: 70 pulls equals 12,600 Clear Drops at 180 per pull.
Do 4.0 teams still work?
A: Not directly. Enemy lineups changed in 4.0, so counter-relationships need rebuilding .
Action checklist
- Clear the 4.0 story first for one-off drops.
- Split three teams by damage, debuff and survival, no repeats.
- Give Insight III to one core per team.
- Push all resonance to 10 before going further on one unit.
- Hold pulls until you have 12,600 Clear Drops.
Game Guides
- Palworld 1.0.5 Base Production Lines: Work Suitability and the Ancient Bark Chain
A Palworld base should not build a little of everything. Lay it out in three zones — gathering, crafting, hauling — and put exactly one Pal on each station, with everything else shifted to transport or planting. Since v1.0.4 dropped Ancient Bark gathering to Work Suitability Lv. 1, the early wood chain costs far less to start .
- Love and Deepspace Memory Progression: Breakthroughs, Empyrean Gems and Stamina
Build the active memory to its level cap first, break through only when the cap blocks you, and dump Empyrean upgrades into a single card. Each day, clear dailies and the home loop before material stages. A limited banner's 70-pull soft pity costs 10,500 diamonds, so never trade diamonds for stamina .
- Honkai Star Rail 4.6 Forgotten Hall: Speed Breakpoints, Relics and Light Cones
Full-starring Forgotten Hall in 4.6 is a speed problem before it is a roster problem. A carry wants 134 speed for two actions in the opening cycle, and supports want 160 to move before the enemy and apply buffs. Two teams cannot share characters, so split jobs first, then chase stats .
- Genshin Impact 7.1 Cryo Builds: Skirk and Escoffier Artifacts and Abyss Teams
The 7.1 double Cryo banners are less about who to pull and more about what you farm afterwards. Cryo carries want a Cryo DMG goblet and 70 percent crit rate before crit damage climbs to 140 percent; support slots want energy recharge and EM instead of competing for crit pieces .
- Wuthering Waves 3.7 Weapon vs Resonance Chain: Which Pull Wins
Two Electro five-stars landed in the same 3.7 patch and your Astrite only covers one. The answer is short: pull the weapon banner first (80 pulls guarantees the rate-up, 12,800 Astrite), then consider Resonance Chain 1 or 2. Chains 3 and up do not decide a Tower clear .
- Zenless Zone Zero Shiyu Defense Full-Star Guide: Three Teams, Stun Chains and Drive Disc Choices
Clearing Shiyu Defense at full stars is not about raw investment. It is about stun order and about never reusing a team across the two halves. Split three teams by job (rush the clock, hold the line, cover the weakness), keep one good drive disc set on the deepest node, and let the other two run 4+2 stopgaps until 3.3 lands .
- Arknights October Progression Ledger: E2 Costs, Module Order and Sanity Math
Spend the last two weeks of October clearing the Hengyuan Jinliang event rewards first, then push Elite 2 with leftover sanity in the order chips, LMD, skill summaries. A six-star from E1 max to E2 costs a flat 180,000 LMD and roughly 900–1,100 sanity .
- Palworld 1.0.5 Breeding Guide: Mutation Odds, Cake Costs, Awakening Order
Applicable version: v1.0.5 (official patch notes, 2026-09-15) · 1.0 release line (Steam release date 2026-07-09)