
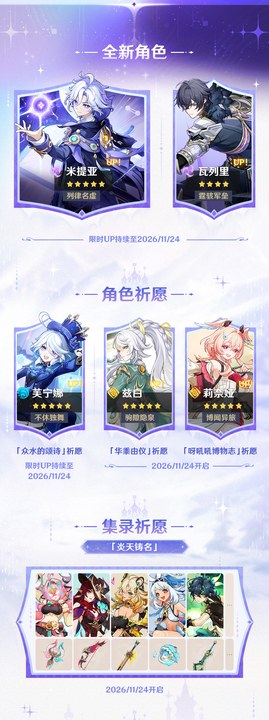
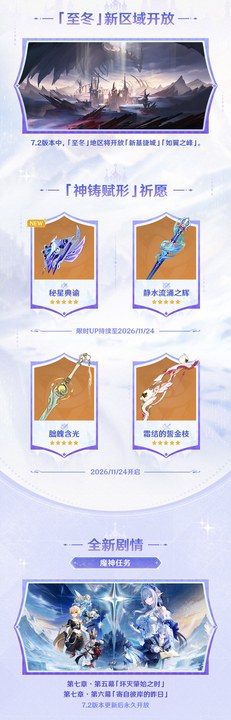
Version 7.2 “When Ruin Begins” went live on November 4 at 06:00. There's a 300 Primogem maintenance compensation, plus another 300 for bug fixes — open both mail messages before they expire. On the banner side, “Myriad Order” has Mitya at rate-up and “Hymn of a Thousand Waters” reruns Furina, while the weapon banner “Epitome Invocation” carries both Secret Star Codex and Splendor of Tranquil Waters. This piece skips the story and the full version overview — it covers three things only: how to build her, how to team her, and whether the Genshin Impact 7.2 banners are worth your Primogems.
Genshin 7.2 Mitya Mechanics: How Star Superconduct Actually Works
Mitya is a 5-star Electro catalyst, with a Star Wedge that is Electro-attuned. The official positioning reads: “an Electro DPS who enables the party to trigger the Star Superconduct reaction, and who can deal Star Superconduct reaction damage in different ways.” It sounds convoluted, but it means one thing: she doesn't earn her keep through raw Electro — Star Superconduct is the main course.
Start with the Pole Star Domain. While she's on the field, the domain follows the active character in real time. It looks like a minor line, but in practice it changes a lot: your DPS no longer has to be nailed inside a circle — swap, reposition, dodge a skill, and the domain stays. Anyone who has played a traditional field-based support knows the frustration of stepping one foot out and losing half your damage. This time that's finally gone.
Now reaction frequency. Star Superconduct is reaction damage, so how fast it fires depends on how quickly the other element on the team gets applied. Mitya can't reach a high trigger rate alone — someone has to keep applying an aura. This is the easiest place to go wrong: dump every resource into Electro DMG while the reaction never actually triggers, and who exactly is that Electro DMG for?
So where is the damage ceiling actually gated? Not in artifacts — in the team you build around Mitya.
Genshin 7.2 Mitya Teams: Three Builds You Can Copy Directly
The skeleton is “Mitya + reaction slot + buffer slot + survivability slot”, with the fourth slot flexing to the Abyss environment. The skeleton isn't complicated; what's hard is deciding who fills each cell.
The most general build is Mitya plus a reaction sub-DPS, a buffer and a healer. The sub-DPS applies the aura and chips in some damage; the buffer supplies ATK or Mastery; the healer is the safety net. It works in most Abyss environments, and the downside is equally obvious: burst damage is spread out, so on floors with a tight timer that grind your health down, it feels painfully slow.
If you're hunting a single-target boss, switch to Mitya with double buffers and a shielder. Mastery and CRIT DMG go up together, and the shield keeps your damage from being interrupted — it is genuinely comfortable, at the cost of demanding a lot from both buffers. If both are half-built, you're better off going back to the first build.
Low-investment accounts should look straight at the third build: Mitya + Valery + buffer + healer. Valery is a 4-star Electro sword added in 7.2, positioned as a support who provides Electro-related buffs and a shield. Because he shares Mitya's element, one character covers both the buffer and shield slots — and 4-stars are easier to max out. Nothing to hesitate about.
Someone is probably wondering: doesn't sharing an element waste a reaction slot? What gets wasted is the slot dedicated to applying the aura; Valery occupies the buffer and shield slots and never took that one. You didn't lose a reaction slot — you only lost one pure buffer.
Assembling the team is only step one. What really eats resources is artifacts.
Genshin 7.2 Mitya Artifacts: Main Stats Are Easy, Substats Are the Grind
The slots are actually fixed. Sands of Eon picks between ATK% and Elemental Mastery, Goblet of Eonothem takes Electro DMG Bonus, Circlet of Logos takes CRIT Rate or CRIT DMG.
Why agonize over the sands? Because most 7.2 buffers come with a big ATK package built in, so stacking more ATK dilutes it. Just look at what your buffer provides: if it gives ATK, take an EM sands — the return is higher.
Substats rank by value as CRIT Rate, CRIT DMG, Elemental Mastery, ATK%. Star Superconduct damage scales with both Mastery and CRIT, but with CRIT Rate under 60%, piling CRIT DMG is just gambling. And gambling is something the Abyss never rewards.
The upgrade order is the same story. A piece whose starting substats include double CRIT is worth leveling first even if its main stat is one tier low; a piece with a perfect-looking main stat and nothing but ATK and DEF substats should be abandoned at level 12. Have you ever thought “one more level and CRIT might roll”, and then fed in a whole pile of fodder? Resources are finite — don't get into a staring contest with a piece.
Artifacts are a long-term project, no rushing it. But one decision can't wait: whether to pull the weapon.

Genshin 7.2 Mitya Signature Weapon: Is Secret Star Codex Worth Pulling?
Secret Star Codex is the new 5-star catalyst in 7.2. Its effect has three layers, all orbiting elemental reactions: it raises the wielder's CRIT DMG; casting an Elemental Skill grants “Crystalline Blend”, boosting Elemental Mastery; while that is active, when nearby party members trigger an elemental reaction the wielder also gains “Torchlight Canon” for another jump in Mastery; and after entering the Radiance: Star Superconduct state, “Torchlight Canon” further increases Star Superconduct CRIT DMG — and it still triggers while she's off-field.
That's why it's so tightly bound to her. All three layers amplify elemental reactions and Star Superconduct, splitting her damage into a Mastery segment and a CRIT DMG segment and pushing each one higher. A 4-star catalyst can patch CRIT Rate, but it can't patch the Star Superconduct CRIT DMG bonus — that part is exclusive to the signature.
If you pull, character first, weapon second. Character pity is 90 pulls; Epitomized Path on the weapon banner costs more. If you can only afford one guarantee, get Mitya first and wait for the weapon's rerun. A weapon with no character to hold it is just decoration in your inventory.
That's roughly the whole build. If your account hasn't pushed into Snezhnaya yet, one thing is worth flagging: a few of the new map's enemies are specifically designed to punish “stand still and just DPS”.

Genshin 7.2 Snezhnaya Map: How to Break the Wave Anchor
7.2 opens two areas, Novokitezh and Winglike Peak. Finish the “Old Ballads of Crystal Streams and Stone Chests” quest series, and the Shadow Domain in eastern Winglike Peak recedes.
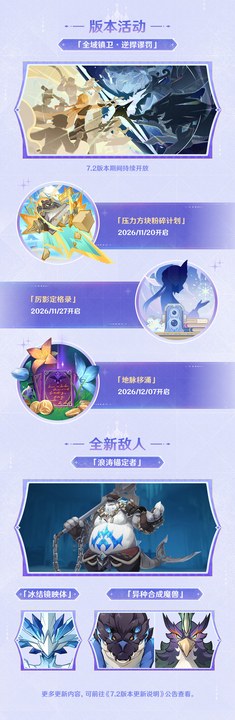
The Wave Anchor keeps drinking hot drinks to build “Valor”, and once it's full it enters a “Valiant” state — its attacks go berserk and all elemental and physical RES rise sharply. Conversely, Electro DMG or Starspark reaction damage drains its Valor. Put simply: don't let it fill up, and suppress it with Electro. Mitya fits that job exactly — call it the version quietly doing her a favor.
One more change worth noting. Under the effect of the Starspark reaction, the Frostbound Mirror no longer has immunity to Cryo DMG, and it also loses its Cryo aura. Cryo teams will be a lot more comfortable in Snezhnaya — that old awkwardness of “Cryo character versus Cryo enemy, spectating the whole fight” is reduced.
Mechanics, teams, substats, weapons, map — we've been through all of it. What's left is the most practical question: do you spend the Primogems.
Is Genshin 7.2 Mitya Worth Pulling? Three Types of Accounts
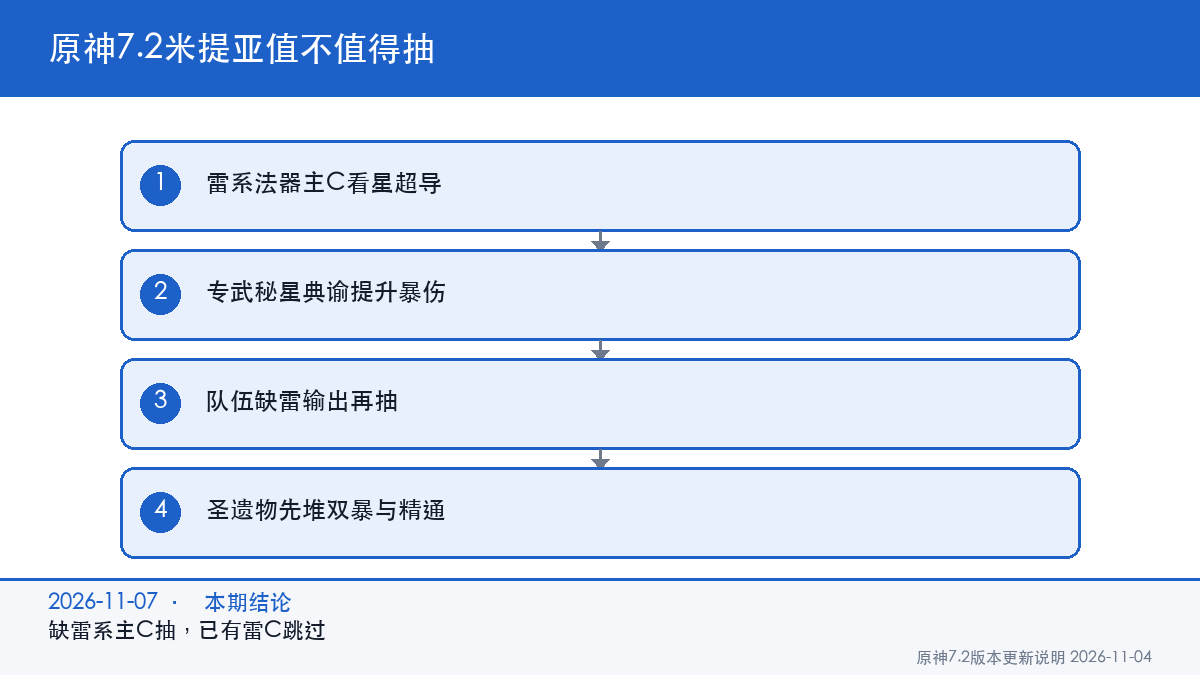
If you're missing an Electro main DPS, pull. If your Electro damage still sits on characters from two or three years ago, Mitya is the obvious generational upgrade.
If you already have a built Electro main DPS, ask whether she gives you anything new. For those accounts her marginal value is mostly Star Superconduct. Want to try something fresh — go for it; just want to clear the Abyss reliably — skipping costs you nothing.
If your budget is under 90 pulls, don't rush this one. Do one thing: grab the free 4-star selector from the “Omnidomain Guardian: Countering the Fallacious Verdict” event and wait for the next version. Her rerun usually lands in about half a year (a pattern in version banner scheduling, not an official promise). Half a year is neither short nor long, but it beats stopping halfway with pity unfinished.
Genshin FAQ: A Few Specific Questions About Mitya
Does Mitya need an Electro teammate?
A: No. Star Superconduct is triggered by the party, so a teammate's element only needs to react with Electro. A same-element teammate actually wastes a reaction slot.
ATK sands or EM sands for artifacts?
A: Look at your team's buffs. If the buffer gives ATK, use an EM sands; if it gives Mastery, use an ATK sands. The gap between the two is 5% to 8%.
Can she work without the signature weapon?
A: Yes. With a 4-star catalyst patching CRIT Rate, Mitya's damage is roughly 12% to 18% lower, which doesn't affect full-star Abyss clears.
Is the new 7.2 map worth pushing early?
A: Yes. Waypoints and gathering points in the new areas come with Primogems, and pushing Chapter VII, Act I of the main story first will auto-unlock the waypoint northeast of Frostsmite Peak.
Is Valery worth building?
A: Yes, especially for low-investment accounts. A 4-star Electro support with a shield, he saves a slot on Mitya's team, and level 70 is enough.
Genshin 7.2: This Week's Action List
- November 7: claim the maintenance and bug-fix compensation, 600 Primogems in total, and confirm the mail hasn't expired.
- Banners: with 90 pulls, take Mitya first; think about the weapon banner once you have her. The build sheet is kept updated on GameHub.
- Artifacts: filter out the double-CRIT pieces first, then set main stats as ATK/EM sands, Electro DMG goblet, CRIT circlet.
- Teams: prioritize “Mitya + Valery + buffer + healer” — 4-star teams are easier to max out.
- Exploration: push Chapter VII, Act I to unlock the Snezhnaya waypoint, and take on the Wave Anchor along the way to confirm the Electro suppression.
Further numeric adjustments for 7.2 will be updated at gghubs.com.