
Version Genshin Impact 7.2, "When Ruin First Stirred," went live on November 4, 2026, with the "Myriad Order, Overflowing" wish running alongside it and a rate-up for Mitya (Electro Catalyst); the 7.2 weapon banner also introduced the catalyst "Edict of Hidden Stars." What sets her apart is that she ignores ATK scaling altogether and reads only EM, which is why the "CRIT Rate circlet or EM circlet?" argument that runs for pages with other characters resolves completely differently for her.
Tier lists shift every patch, but the underlying logic of a build depends on one thing only: the scaling type. This guide starts with EM and works through weapons, artifacts and team compositions. The exact numbers and any later revisions live in the Genshin section of gghubs.com.
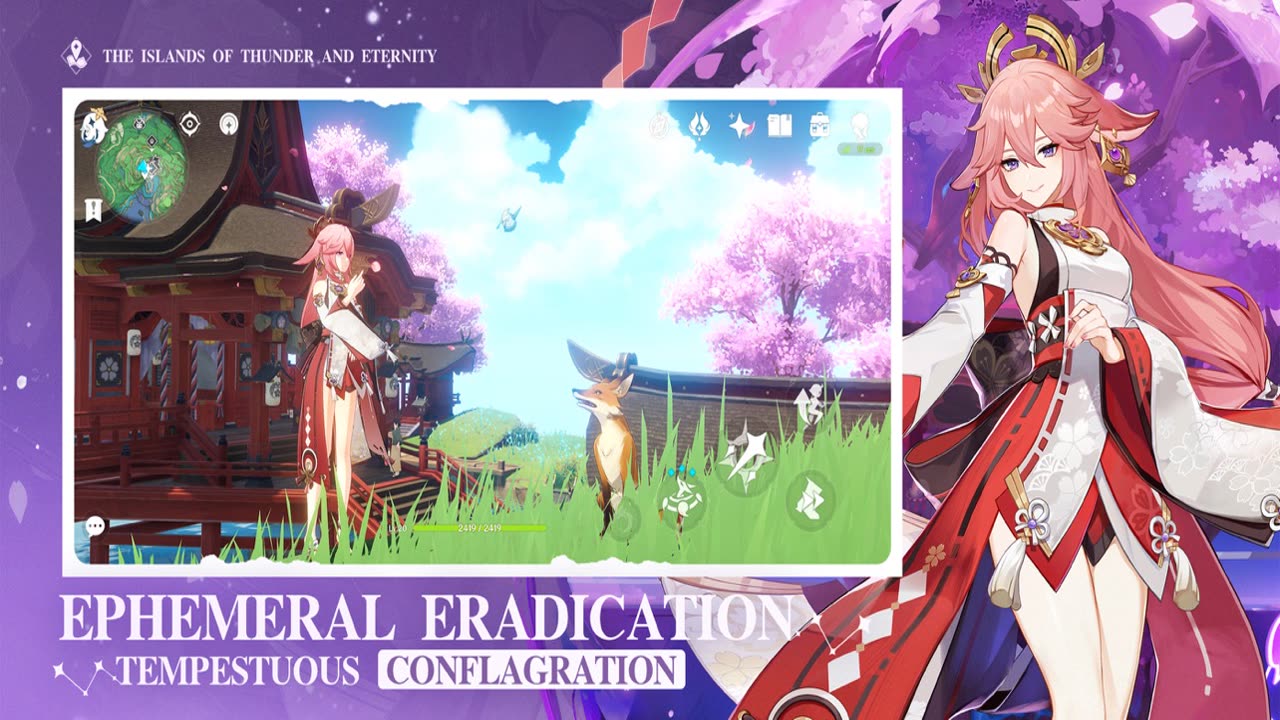
Genshin 7.2 Mitya's Kit: Stellar Superconduct Scales Off EM
Mitya switches between two playstyles depending on whether you hold or tap her Elemental Skill: hold for an on-field main DPS, tap for an off-field sub-DPS. Either way, the core loop is the same: convert the Cryo-Electro reaction into Stellar Superconduct, then use it to deal Electro DMG.
When the skill lands it plants a Sensing Core; you build Flux Beacons around it, then spend them to fire off Stellar Superconduct Electro DMG. Her Burst is more direct: it grants three Beacons the moment it is cast. So "one Burst per rotation" is not a min-max target but a prerequisite. If the Beacons are not topped up, your Charged Attacks are essentially swinging at air.
Why does EM matter more than ATK? It comes down to damage buckets. Stellar Superconduct Electro DMG scales off EM, and EM feeds two buckets at once, the multiplier itself and the reaction DMG bonus, while ATK does almost nothing for her. That is why the high-ATK 608-base catalysts feel unremarkable in her hands.
One more point that is easy to flip: the rule is not "the higher the CRIT DMG, the better" but "get CRIT Rate up first." Her kit comes with 20% CRIT Rate, and the 4-piece Phantasm set trims her CRIT Rate requirement by another 10% to 15%. Stacking CRIT DMG before CRIT Rate has caught up just means gambling on crits. Raise the multiplier with EM first, then come back for CRIT, and do not reverse the order.

Genshin 7.2 Mitya Weapons: Signature vs. R5 Four-Star
Her signature, "Edict of Hidden Stars," grants CRIT DMG, EM and Astral DMG bonus, and it is genuinely the best fit. But it is not the only answer: R5 limited four-star catalysts generally reach about 90% of it.
Taking the R1 signature as 100%: New Year's First Clear sits at 86.93% (sub-DPS) and 90.87% (main DPS); Star-Offerer's Longing at 87.85% and 95.24%; Casket of True Words at 82.87% and 78.02%; and A Thousand Floating Dreams at 82.6% and 86.52% on a double-Electro team. The ranking between main and sub-DPS flips: in on-field builds, Star-Offerer's Longing gets closer to the signature than New Year's First Clear does.
The four-star worth watching is R5 Snowbound Heart. On a double-Electro, double-Cryo lineup it reaches 91.85% (sub-DPS) and 94.75% (main DPS), close to a straight swap in main-DPS builds. Frosthour hits 89.27% in main-DPS builds, Game of Kings 79.76%, and Jade of Forgotten Rites 73.88%. On a budget, pick one of Snowbound Heart or Frosthour and stop cycling through four or five four-stars.
Constellations or signature weapon? If you intend to invest, go straight for C2: it is the breakthrough point and worth more than a weapon. Only if you plan to stay at C0 long-term and do not own a replacement weapon above 80% does the signature become the right call.

Genshin 7.2 Mitya Artifacts: 4-Piece Phantasm or 4-Piece Gilded Dreams
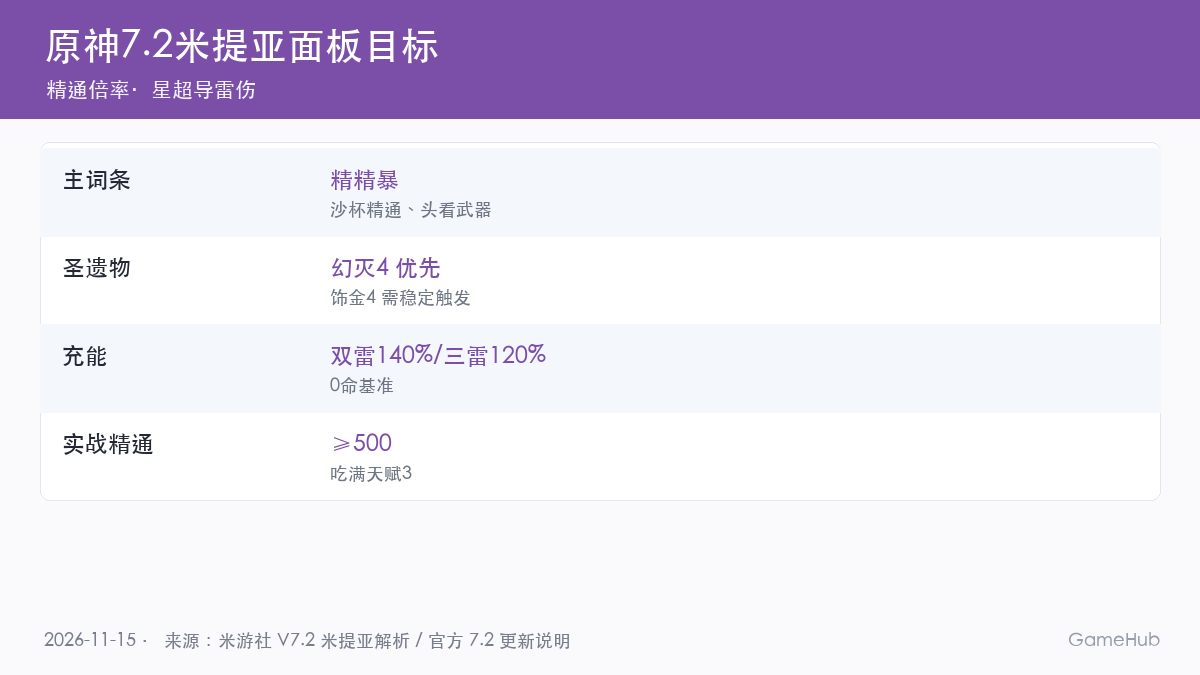
For damage, start with the 4-piece "Phantasm Congealed in Shadow." It directly lowers her CRIT requirement and leaves the most room in the build. A 4-piece Gilded Dreams stays neck and neck with it as long as you can keep the trigger up, but against high-Electro teams that leave enemies permanently Electro-aura'd, its uptime starts to slide.
Main stats decide your damage more than which set you pick: EM on both Sands and Goblet, and for the Circlet, read your weapon. CRIT DMG or EM weapons take a CRIT Rate circlet; CRIT Rate weapons take a CRIT DMG circlet. Applying one template to every weapon is the most common way this build goes wrong.
Energy Recharge counts as a valid substat on her, especially at C0. C0 double-Electro wants 140% or more, triple-Electro around 120%; past C1, triple-Electro needs essentially no extra ER. If your substats carry no ER at all, sacrifice one EM slot for an ER Sands rather than letting the rotation stall.
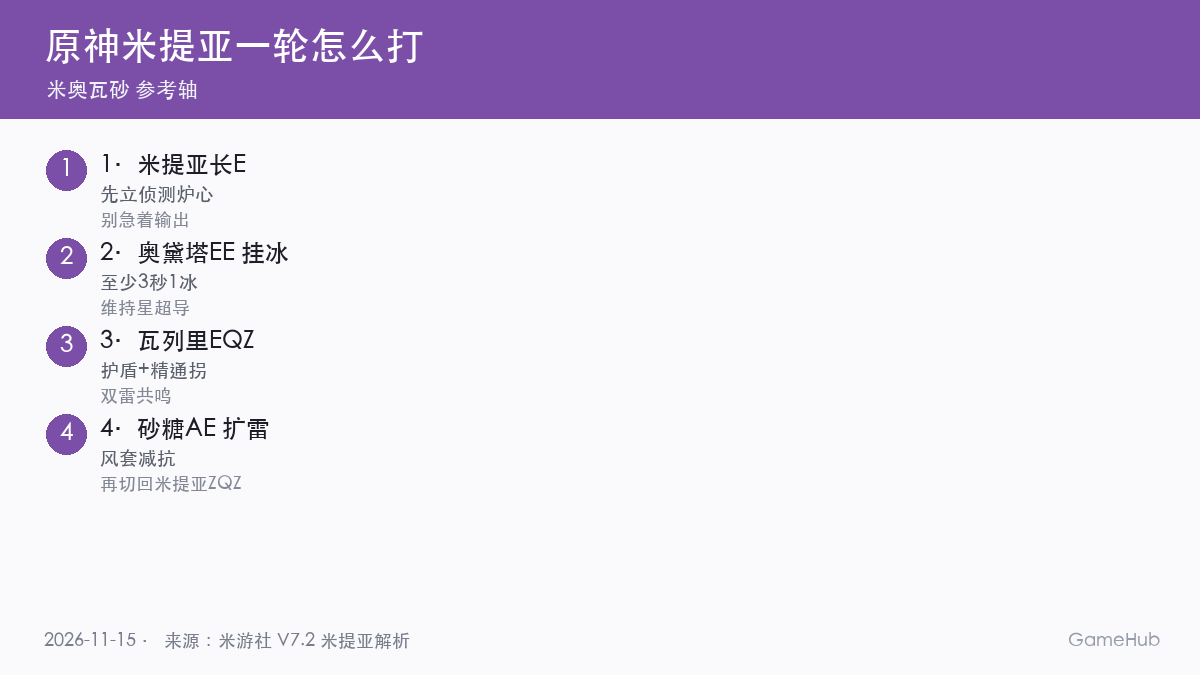
Genshin 7.2 Mitya Teams: Double Electro/Single Cryo and Triple Electro/Single Cryo
Team needs follow the playstyle. For sub-DPS, the priority is a teammate who applies Cryo reliably, at least once every 3 seconds, plus an Electro teammate to complete double-Electro resonance. For main DPS, beyond Cryo application you also want a shielder, Electro RES shred and a healer.
The cheapest team is Mitya + Odetta + Valeri + Sucrose, the lineup players call "Mi-Ao-Wa-Sha." Odetta applies Cryo roughly every 2 seconds and buffs Stellar Superconduct; Valeri handles shields and EM buffing while rounding out double-Electro; Sucrose brings Viridescent Venerer for Electro RES shred plus another EM buff. Two four-star slots keep the cost very low, which makes it the most universal answer this patch.
Triple Electro with single Cryo suits players who already have constellations. Triple Electro generates plenty of particles, so Mitya can reliably Burst once per rotation and the C0 ER requirement drops from 140% to around 120%. The trade-off is fewer RES-shred options: against high-RES bosses you are leaning on C2 or on a teammate with built-in shred.
Different rosters open other routes. Mitya's tapped skill lets her sit off-field applying Electro continuously while raising the whole team's EM, so paired with a Stellar Superconduct Cryo DPS such as Sandrone she does two jobs at once: EM buffer and sub-DPS. Without Odetta, running her with a 4-piece Hearthfire set to cover reaction buffs also works.
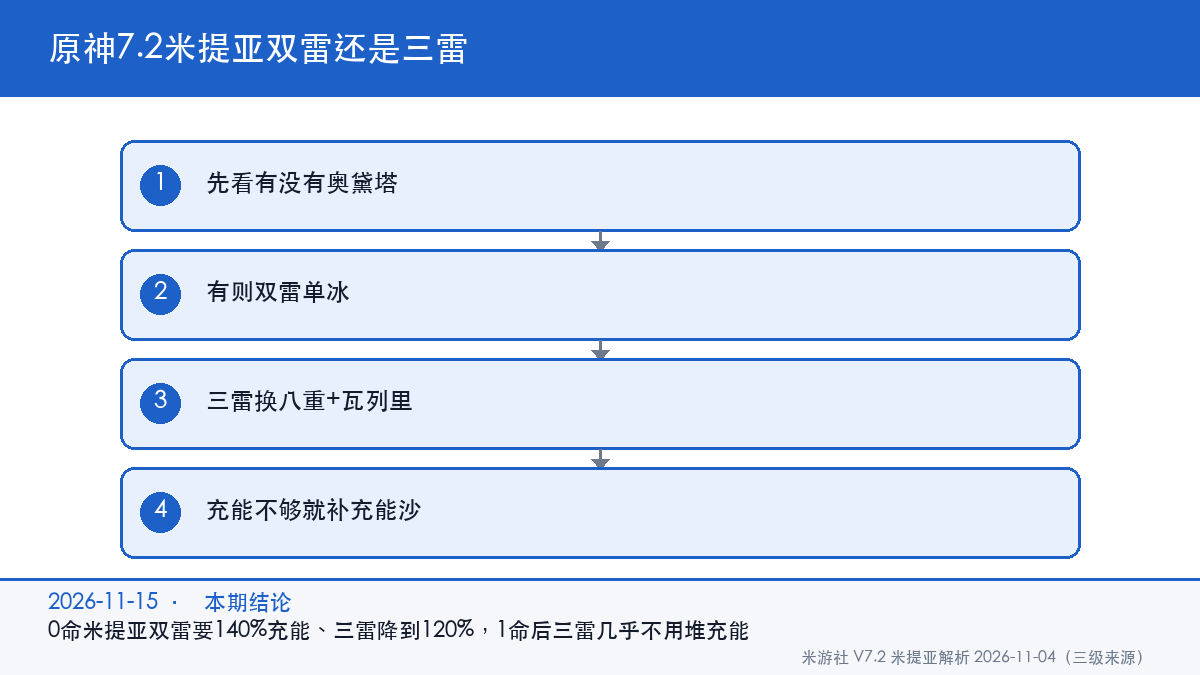
Genshin 7.2 Mitya Rotation: How to Play One Cycle
The order inside a rotation is essentially fixed: Mitya hold-E to plant the Core, Odetta EE to apply Cryo and maintain Stellar Superconduct, Valeri EQZ for shields, the EM buff and double-Electro resonance, Sucrose AE with Viridescent Venerer for Electro RES shred and Swirled Electro to reset the EM timer, then Mitya ZQZ (hold E) to dump every Beacon at once. This line follows the HoYoLAB 7.2 guide; in practice, adjust it to your own energy and the enemy's rhythm.
When to hold-E depends on energy. If energy is not full, hold-E early without worry. If it is already full, or if your weapon needs a skill cast to trigger its effect, do not hold-E ahead of time, because uptime will drop. Hold-E right as you begin dealing damage instead.
Sucrose is worth swapping back to. Mitya does not lose her state on swap, so after one or two Charged Attack cycles, switch to Sucrose and Swirl Electro a second time. That resets the EM buff timer and gives Mitya room to recover Beacons.
Genshin 7.2 Mitya Ascension Materials
Leveling from 1 to 90 with talents at 1/9/9 costs 1,652,500 Mora, 3 Teachings of "Compassion," 21 Guides, 38 Philosophies, 6 Chimeric Seeds, 22 Twinned Chimeric Cells, 31 Primordial Chimeras, 6 Masks of the Sage-Physician and 1 Crown of Insight.
Talent priority is Normal Attack first, then Burst, then Skill. Her damage comes from Charged Attacks and from the Burst settling Beacons, so the skill itself is closer to a resource generator.
Only after the main stats are in place and EM is past 500 does substat perfection become worth discussing. Chasing CRIT on substats pays off far less than capping EM and Energy Recharge first.
Genshin 7.2 Mitya FAQ
Does Mitya need her signature weapon?
A: No. R5 Snowbound Heart reaches 91.85% of the signature as a sub-DPS and 94.75% as a main DPS on double-Electro, double-Cryo, and the gap is even smaller in main-DPS builds.
How much EM should I stack?
A: At least 500 in combat to fully benefit from the third passive talent. EM on both Sands and Goblet is the fastest route there; measured performance drops off noticeably below 450.
Double Electro or triple Electro?
A: C0 double-Electro needs 140% or more ER, triple-Electro about 120%. Past C1, triple-Electro needs almost no extra ER. The weak point is limited RES shred, and C2 covers one tier of it.
CRIT Rate or CRIT DMG on the Circlet?
A: Depends on the weapon. CRIT DMG or EM weapons take a CRIT Rate circlet; CRIT Rate weapons take a CRIT DMG circlet. Do not apply one template to every weapon.
Action Checklist
- Swap the Sands and Goblet to EM and push in-combat EM past 500.
- Use R5 Snowbound Heart or Frosthour as a stopgap weapon, and do not chase constellations just to justify the signature.
- Put together 4-piece Phantasm first; get the main stats right before worrying about substats.
- Start with Mi-Ao-Wa-Sha and push ER past 140% on double Electro.
- Run the rotation as hold-E, apply Cryo, shields, Swirl Electro, ZQZ, and time hold-E around your energy.